Monday, November 30, 2009

ORE TRANSFER CAR - Part 2


There is not a right angle in the whole mess that makes up the hopper assemblies.  I cut and fit the hopper end top pieces and then built the bin dividers.  After this I removed the portions of the original hopper bottom plates to give it that sectional appearance.  I also added some .030 strips to make the hopper sill plates 

Sunday, November 29, 2009

ORE TRANSFER CAR - Part 1


I finally was able to find a copy of plans for the ore transfer cars at Bethlehem Steel.   I had considered building it off the photos, however, it is a bit more complicated than it would first appear so I am happy to have the plans.  I printed the plans out on 11x17 paper to as close to HO scale as I could.  It is still necessary to use the printed dimensions where possible as the plans were photographed so there is some distortion.   I might build additional transfer cars in the future (Beth Steel had at least three or four I think)  but for this unit - it will be a static model, and it will be gauged to at least roll on 7' 10" track, just like the prototype.   Another modeler from the Steel Mill Modeler's group - Steel Man Jules, built a well done operational version using a Bachmann GP30 drive.  The car runs on standard HO track with false truck sideframes giving the appearance of the wider gauge.   Since I am building the prototype highline with the wide gauge track I figured I'll stay true to scale.   
Construction on this model started with the main framework - two 3/16" channels with 1/8" square cross bracing.  I used .030x.250 strip for the end plates and the same material cut-down for the floor supports.  I added a .040 deck on each end and then cut and added the bulkheads for the hopper section.  To square up the ends I built the operator cab walls.  As I wanted to keep everything square I didn't cut the doors out of the side walls yet as this would have made things weak.  I will do so after I add the cab roof panels.   Unfortunately the hopper is not just one big box - it has all sorts of crazy angles and is actually four compartments with four operating doors.  To get started with this I cut and fit the hopper ends and the two panels forming the v-shaped bottom.  I filled the space between the bulkheads and the hopper ends with a styrene platform - this is where the machinery that opens the doors is located.   Eventually I will have to cut out part of the middle of the v-shaped bottom, but only after I cut and fit all the remaining panels.  

S.S. VALHALLA Part - 1


I talked earlier this month about my poor judgement in using foam as a core for the A-furnace foundation.  In keeping with this, I tossed the foam core I was going to use to build the SS VALHALLA,  a freighter, in my port area.  Although I hadn't actually added any styrene to this I figured I would end up having the same issues so I built a new core out of layered MDF (medium density fiberboard)   MDF, is a bit harder to shape and cut than foam but I am happy with my results.   If you are wondering about the name of the ship - it's my hometown in New York.   I know, strange name for a town,  and coincidentally (or maybe not) the town is actually a necropolis as the dead outnumber the living by many many times.  The New York Central even offered a special funeral private car from New York City -  might make an interesting operational scenario for the Operations SIG.

Sunday, November 15, 2009

ELECTRIC MELT SHOP - Part 10


Not much modeling to report.  Plenty of model railroading, just not on our layout.  Our friday night operating sessions are something we look forward too, especially Jimmy, after a week of school and work.  We also volunteered to help out at a few of the open houses this past weekend - Jimmy was at the Kade RR and I helped out at the Camden and South Jersey.  It's great to see all the kids that are in awe of what they see, but sadly, most of them probably will never take up the hobby.  I guess there are many reasons for this, but I feel that one of primary ones can be found at home - parents over-scheduling their children's free-time.  When I was young I would say at least 90% of my free time was mine to do as I wanted - play in the woods, ride mini bikes, fish, model railroading, model rockets, building plastic models, painting miniatures, playing games,...etc.    Now society has programed parents into thinking that if their children are idle they will some how miss out on the financially successful life they should be striving for.   Many teachers contribute to this mess - if your child isn't getting A's it's because you are a bad parent and aren't spending 4 hours a night working on their homework with them - of course it couldn't be bad teaching (which there is way too much of) or  politically correct lesson plans from outer space.  What happened to educators educating my child?    Think of all the skills and creative thinking that a 12 year old would get out of a model railroad, unfortunately none of them I guess will help get him into Harvard.   Well I guess we can hope that a few went home and their dads or moms went out and bought some supplies to help them start putting a layout together.   At the open house I was at, only one parent, and believe it or not it was a single mom,  spent around 15 minutes talking about what she needed to do to get started - fortunately the owner of the layout was giving away some old issues of Model Railroader - hopefully those help her.    At 43, the one thing that is wearing thin on me is that way too many people, upon identifying me with this great hobby - (1) tell me about all the Lionel crap they have in some box somewhere and then (2) ask me to affirm their belief that it is worth somewhere between $500,000 and a million dollars .  I wish for once someone would ask me how they would get started with putting it together and getting it running.  
Enough ranting -  
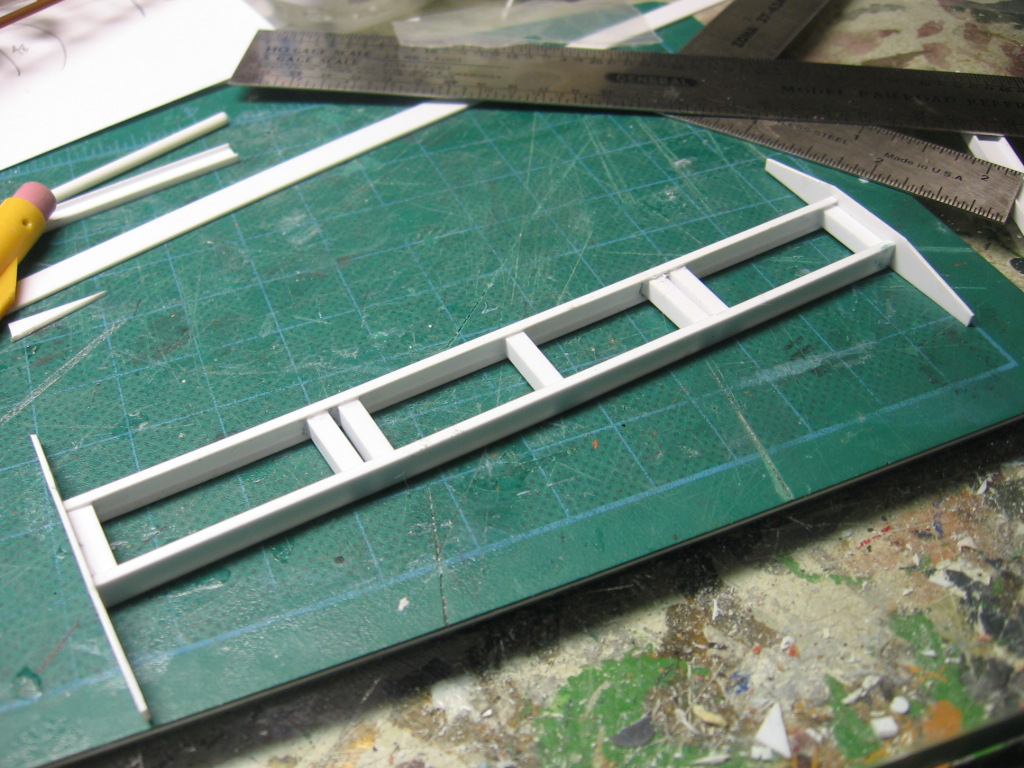
I've been working on the melt shop some more, adding structural elements to the existing model.   A few more things were added to the rolling stand.   I'm excited about my finishing mill - I just need to pick up the additional rolling stand kits.  I was planing on using my hobby allowance this week (I get it every other week)  to order these kits, but I ended up buying the Morning Sun Steel Mill Railroad book  that just came out.  I liked it but I'm not sure it met my expectations totally, especially for the hefty prices on these books.  The coverage was spotty and I got the sense that the author doesn't understand the steel industry as good as he should to write about the railroads that serve it.    I also bought a little paperback on the Pennsy waterfront operations in Jersey City that was actually very interesting.  The author didn't have a vast railroad knowledge, actually I felt he probably wasn't actually a railroad historian either as he identifies the locations well but is very sparse on background info and he doesn't give you the bigger picture of the overall operations.  In one picture he even mistakes the end of a baggage or passenger car for a boxcar.  The pictures are mostly from the Jersey City public library collection and they are very good and for $15 well worth it.  The intention seems to put one of these books together on each railroad in Jersey City.
 

Monday, November 9, 2009

GLASS FACTORY - Part 1


In an earlier post I alluded to a future glass factory project based on the Walther's Electric furnace kit.   The prototype I am using was the Midland Glass facility just outside Matewan, NJ on the Central Railroad of New Jersey.  It was in operation until the mid 1990's when the cost of electricity and NAFTA led to it's closure.  It's primary product was glass bottles.   The facility is pretty large and I have no intention of modeling the entire thing, rather, I am building it as a larger backdrop type structure - I am only modeling a portion of the buildings that fronted the railroad tracks.  This is the interesting portion of the facility anyway and the rest is pretty much just huge boring warehouse type buildings.    The first step is to build two halves of the electric furnace building - I am not using the lower section or the trusses or columns.  Most of the later were used on the Electric Melt Shop anyway.  

A-FURNACE PART 22


New casthouse foundation.   It is built out of 1/2" mdf and is nice and solid.  I re-glued the columns and side trusses back in place on .030 styrene pads.   It needs a little clean up and filling, and I need to define the iron and slag runners better, but otherwise I'm glad I revisited this structure as the old one was actually in a lot worse shape than I had thought.  The solvent based glues I had used, I thought, sparingly, dissolved large chunks of the foam core.  

Sunday, November 8, 2009

ROLLING MILL - Part 1


There should probably be a sub-title for this blog - secondary mill.   I intend to have at least two rolling mills on the layout - the primary mill is going to be located just off the main yard and one secondary mill will be located on the coke works branch.   I am working on the secondary mill first.  The main building is built from two of the old Walther's Rolling Mill kits.   The newer version is actually two of the old building with a roll stand and various other details.   I was able to purchase the interior as a separate kit from Walthers.  It contains all of the interior details from the kit.    Prior to the release of this kit I had purchased some resin castings of a rolling mill and a scale breaker.  These are well done and reasonably priced castings, but they are not complete kits - much needs to be added to complete them.    In comparing the resin mill stands to the Walthers, the resin stands are much larger.   I intend to use these larger stands in my primary mill, and use the Walthers stands in the secondary mill.  Eventually I will be putting four of these stands together.  The photo shows the first stand pretty much complete.  I need to add some additional pieces to build up the conveyors to the right level.  The motor and drive train details, which are well done, need to be truncated a bit to fit in the building and still have one of the tracks useable.  I have sawn off the one motor completely.  This actually is prototypical, as the motors were usually in their own room, to isolate them from the dirty rolling process and to keep them cool.   

ELECTRIC MELT SHOP - Part 9


I'm using styrene strips and structural shapes to beef-up the kit trusses and columns.  I started by applying 0.030x.250 strip under the trusses with .060x.100 horizontals.  I am also laminating the exterior of the columns with 1/4" channel.  You can also see some more work on the crane.

Tuesday, November 3, 2009

A-FURNACE PART 21


Not exactly back to working on A-Furnace but I will be real soon.  One of the things that have been bothering me with this structure was the foundation of the cast house.  I have never been thrilled with its appearance or construction, and I was having problems with warpage that was causing the structural columns to lean out of plumb.   The styrene over a styrofoam core was just not a good idea.   The more work I did on the blast furnace proper the more this would probably bother me, so I figured I better solve this problem now.  I intend to build a new base using MDF and scrap the old one.  I was able to remove intact the wall framing, so I should be able to just reattach this to the new base.    Photo is the old foundation RIP

ELECTRIC MELT SHOP - Part 8


The Walther's October sales flyer had an offer that was too good to refuse - the electric furnace kit for about $30 off list price.  I probably should have bought five or more, but watching the budget I bought one.  The kit will never be built as intended - the parts will be broken up and used for two or three different purposes. -  1) Some of the columns, girder rails, and trusses will be used to extend my existing electric melt shop.  As is, it is too boxy looking, and the extra trusses will add some length too the structure.  I intend to leave the panels off this part of the building as Dean Freytag does on some of his structures where he as finished the interior.  2)  I will be using the wall and roof panels to build a model of the Midland Glass Company - a New Jersey glass bottle manufacturer (more on this in a future blog).   And 3)  I might build a second electric furnace.   The photo shows the melt shop with the extended truss sections.